
Banana Split

Okie Doke!  This week at Paper Vineyard, we were challenged to create a project inspired by the Banana Split pictured above.  Couldn't you just jump through the screen right now and gobble that up???  What I love the most about this banana split is the color palette!!!  I never thought I would EVER say that about ANY banana split!!!   These colors are just so inspiring!!!  So I created:


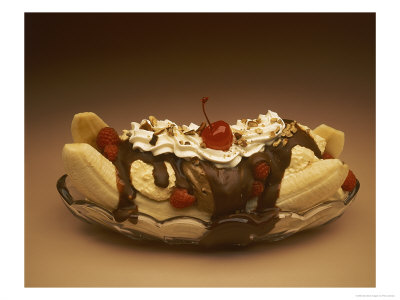
DON'T YOU JUST LOVE IT!!!???!!!  Honestly, I wasn't planning on creating anything as my plate is sort of full for the month, but Bo Bunny arrived at the store and I just couldn't help myself.  I was ALLLLLLLL over it!  I bought ALL the papers from the Et Cetera line (plus the buttons and trinkets) and then MOST of the papers from the Double Dot Designs!!!  These lines are AMAZING!!!  There were also goodies from the new Christmas line, but I finally had to stop looking and walk away.  OMGosh, these lines ROCK!!!  So along with the color palette, the cherry on the banana split also caught my eye.  I remembered that I had purchased some cupcake stickers the last time that Els of Elizabeth Craft visited the store and taught some classes.  And, of course, with the right Glitter Ritz glitters, this project would EASILY come together to match the colors of that yummy, yummy dessert!!!  I ended up using a silver rhinestone brad to pull the whole thing together because I didn't have gold cupcake stickers (and they'll certainly have to wait now cuz I just bought a ton of Bo Bunny!!!), but I think it all looks quite nice together.  Whew... this was a GREAT one!!!  Click HERE to check out what the rest of Paper Vineyard's design team created.  It was definitely a fun challenge!!!

Comments

I love Bo Bunny and can't wait to get the new lines!!! I loveeeeeee your card!! LOVING the cupcake! :):):):):):):):):)
Alison said…
Ooh! Is 8 in the morning too early to early to be eating ice cream? 'Cause now i want some! Great project! I love all of that glitter!
Besthobbyeva said…
I love this card!! Love the cupcake and the paper, great job!!!

Laurie

Past 7 Days....

MY VERY FIRST CRICUT CARTRIDGE GIVE AWAY!

Ok ... so the time has come. I've got some BRAND NEW, NEVER BEEN USED, STILL IN THE PLASTIC Cricut Cartridges to give away over the next couple of months and it starts with one of my ALL-TIME FAVORITES...... Hannah Montana! YAY! I LOVE this cartridge! It's got the most beautiful guitar images along with musical notes and FIVE fonts! I used the regular font and the rock star font to create my Father's Day card this year (see above). I also used the Hannah Montana cart (see below) to create a beautiful butterfly (FREE Gypsy cut file HERE ), and am currently working on a project using the gorgeous solitaire diamond. There's a rose and lips and decorative hearts, even a Pegasus ! There's just so much on this cartridge.... I use it a lot! To call this a "font" cartridge is terribly misleading. It's been a long time favorite and now I'm THRILLED to be able to give it away to one of my awesome readers! So here's how to win: Become one of my follower

The BEST Copic Storage

**** HUGE HALLOWEEN GIVE AWAY... CLICK HERE !!!!**** Ok, so I've done posts in the past about various Copic storage solutions, but I was given THE MOTHER of all storage ideas by my friends Jennie Black and Krista Koenig!!!   Let me share with you the construction of the storage box and then I'll finish this off with the BRILLIANT solution my husband came up with.... cuz I married a GENIUS!!! What you'll need to create the AWESOME storage box pictured here is: 1 Double Deep Art Bin 1 plastic grid for ceiling lighting (found at your local home improvement store) 1 half inch thick wooden square dowel (also found at your local home improvement store) Dimensional adhesive squares Wire cutters or sheers Screws with corresponding drill bit Drill So I first cut the ceiling grid down to 19 squares by 19 squares using my wire cutters.   You will need two 19 x 19 sections of grid material.   The wire cutters went through the plastic material of the grid like butter and I

Velcome To The Little Hop of HORRORS!!!

MUWAHAHAHAHAHAHAHA! So I tried to make the title sound really spooky and ran out of room to include my evil laugh... hahaha! WELCOME HOPPERS! Are you thoroughly spooked and amazed? I know I am! You already know that today is the start of our Halloween celebration with a blog hop organized by my good friend Nicole of Canadian Nickel Scrap'n . If you're currently hopping, you should be arriving here from the Fabulous Eulanda's blog ... wasn't that Caramel Corn Box AWESOME?!? If you haven't arrived from Eulanda's blog and are just now joining us, hop to the bottom of this post for details on how the blog hop works. And now for my scary good fun before you head over to Gloria's blog on the next stop of this hop. Today I've got the "Welcome" sign that I will be hanging in my foyer this Halloween. I used my Simple Frame Gypsy cut file as well as the pumpkins and faces from the Pumpkin Carvings Seasonal Cricut Cartridge (just like the one I will be g