
Who Let The Dogs Out

I know.... super corny title!!!  But this little guy needs some attention:

Isn't this one fun???  Today I get to feature "Texture" over on the Spectrum Noir Blog.  Not only did I FLOOD this card with texture, I also added a bit of texture to the Puppy Stampendous image to make him look furry.  The technique is so very simple.... once you've colored the image, simply take your blender pen and stipple.  Be sure not to over-stipple; remember that with the blender pen, the effect needs time to develop.  But within seconds you get insta-fur!!!  The Spectrum Noir colors I used were:
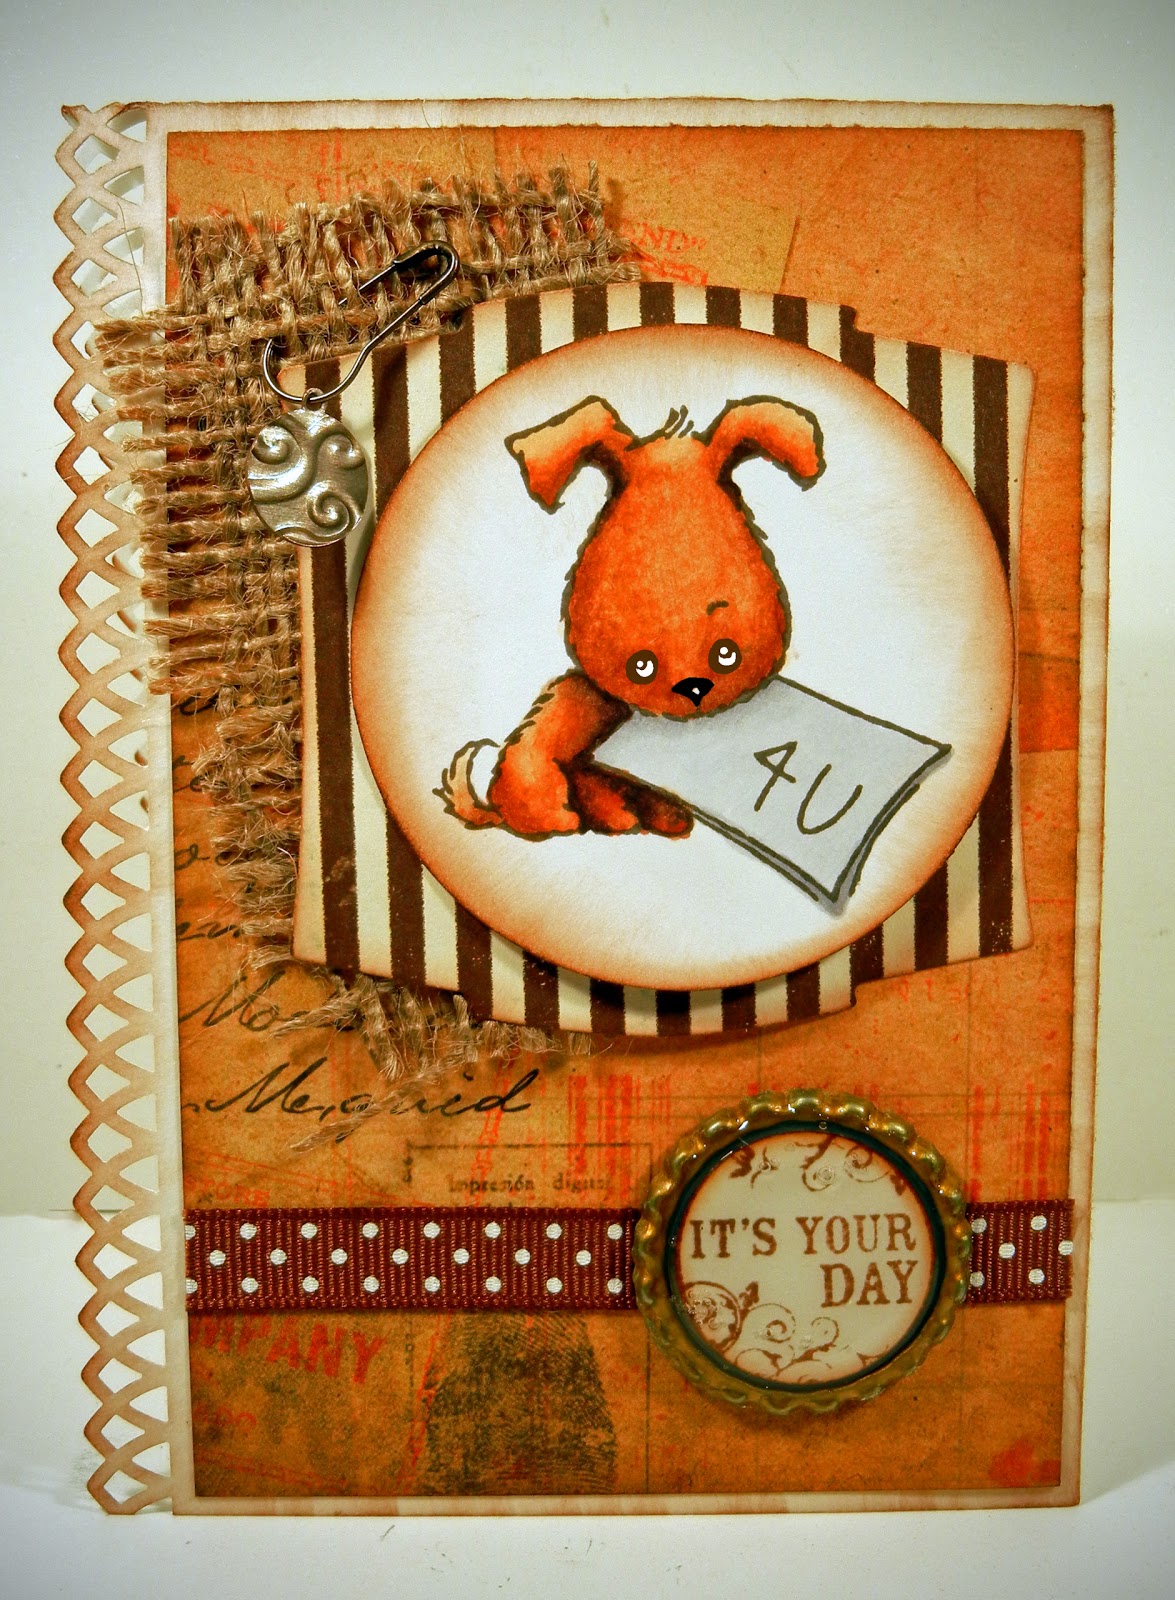
Dog:  TN1, TN3, TN5, TN9 and EB8
Letter:  IG1, IG2 and IG4
***eyes and nose were accented using sharpie and white gel pens

Other texture elements were in the different print papers I chose, the different fibers and the FUN stuff like..... I embossed a Vintaj charm in my Big Shot!  I also "smooshed" a bottle cap in my Big Shot and made a fun metal embellishment.  Here's how:
  • Place your bottecap in the Big Shot between two clear plates.  Make sure your multipurpose platform is set for embossing. When you run it through... it won't feel like anything happened, that's because the bottle cap is so small. :)
  • Then, color the edges of the bottle cap gold (if needed).  I used an American Crafts Gold Metallic Marker.
  • Stamp sentiment and punch out using 1" circle punch.  Chalk edges.
  • Position in the center of the bottle cap.
  • Finally, fill bottle cap with Glossy Accents and allow to dry.
  • For those in a hurry, 1" epoxy stickers can be used over top of your sentiment... I just haven't found any epoxy stickers that last very long, so I've stopped using them.
Ok, that does it.  This should be enough texture to keep everyone going for awhile!  LOL!  Be sure to head over to the Spectrum Noir blog.  Every day the design team shares awesome projects, tips and techniques.  This design team is turning out to be an AWESOME resource!!!

Comments

ADORABLE!! I loveeeeeeeeee the colors and the burlap!!! Can't wait to see you tomorrow!!!

Past 7 Days....

I'm Terribly Late.... I Know.

Yes, Yes... I'm terribly late... I know!  I was supposed to announce on April 1st that I'm having ANOTHER Favorite Things Birthday Give Away.  Well, here I am.... 7 days late, I'm here with the announcement.  BUT FIRST:  Let's check out some of the prize goodies!!! So pictured above is nail treatments from my ALL-TIME-FAVORITE nail treatment company... Nail Aid .  I LOVE their products, I LOVE their company and I LOVE their service.  And this year they GENEROUSLY donated another HAUL of their new products available at Walmart (check your local store for availability as I'm finding that not all of them carry it... which is NUTS!).  They are just so generous... THAT'S FIVE PRODUCTS!!!  Now I've never tried these products... being that they are new, but I personally use MANY of their products and I love them.  So be sure to check out their website by clicking the link above.  And just so you know which ones are my favorites, I...

My Seriously Yummy Concoction!!

The Magic Bullet has yet to fail me!!! I LOVE it! I whipped up this ultra healthy mousse in seconds, and the mint came straight from the garden. Yay! Here's how I made it. Danielle's Heavenly Mousse 1 small container of low fat vanilla yogurt (I prefer Yoplait Light) 2 heaping tablespoons of Knudson Free cottage cheese 1 tablespoon of Amaretto flavored Agave Nectar 1/4 teaspoon of cinnamon 2-3 peeled and pitted organic figs (optional) In Magic Bullet container combine above ingredients. Attach flat whipping blade and mix until mousse has formed (about 45 seconds). That's it. If you are using figs (which will create a thicker mouse after it sets in the fridge and will require longer blending time), be sure that they are room temperature before blending. Blend with chopping blade, remove and attach flat whipping blade until smooth. Allow to set in fridge at least 30 minutes before serving. This thing is quick and incredibly yummy! Here is the pic of the ingredients I used. Cl...

Gorgous Leaves Bundle Revisited

Yestday's Freebie Friday on a Monday projects were so fun and this set is SO BEAUTIFUL in it's simplicity!  It reminds me of a long-retired stamp set from Stampin Up!.  I was inspired to re-create the projects that I made with it once upon a time.  So here we go.... SIMPLE projects when you need a quick "hello" or an even quicker heartfelt sympathy card: I was DEFINITELY on a Bumblebee and Cajun Craze kick yesterday!  I can't stop/won't stop!  LOL!  To be fair... I had extra leaves die cut and didn't want anything to go to waste!  A quick speckle backdrop in Bumblebee then a quick "hello" greeting from the Biggest Wish in Cajun Craze with the Cajun Craze leaf popped up on a Basic White cardbase.  PERFECTION! Okay, as with yesterday's projects, the sentiment is from the recently retired SAB Delicate Dahlia's set, but you could use ANY sympathy sentiment you have in your stash.  Unlike in the past when I had to mask off the center rectangle...