
This year is a special year for me and the mister.... 17 YEARS OF MARRIAGE!!! That is definitely something to be excited about! And to celebrate, he and I went RING SHOPPING TODAY!!!! YAYAYAYAYAY! We won't actually be celebrating our anniversary for a while, but why wait!?! Every day is the perfect day for new jewelry, right?!?
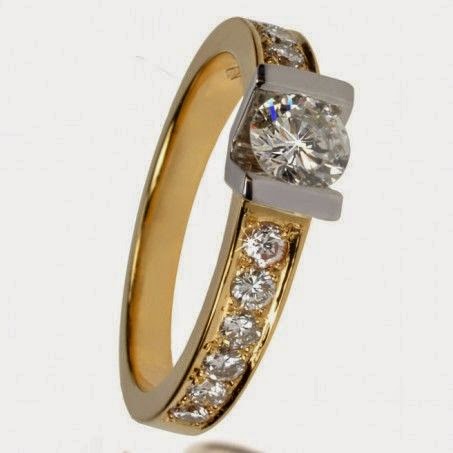
When he and I first discussed the idea of upgrading, I was concerned that our finances just wouldn't allow for a new ring purchase.... let alone an UPGRADE. Then we discovered it CAN be done and within budget if you're willing to "trade in" or "recycle" what you currently have, so I wanted to share what we learned. I also thought I'd show you some of my favorite styles of rings, so I'll sprinkle those along the way throughout this post. Clicking on the pics will open links that will take you to the sites where I found these rings. You'll just have to wait (like me) to see what I actually end up with. The one at the top is my favorite, but with a $40K price tag, NOT INCLUDING the center stone, it is just going to have to stay on my wish list.....

1. Start with a plan. I went to Pinterest for engagement ring styles that I like. Don't worry about the price tag (unless it's $40K), because what you're basically looking for is what you like and what you don't like. This will come in handy on a later step (keep reading) and will also save you a ton of money in gas! See, you're already saving $ and we just started.


 4. Have it custom made. I was SHOCKED how affordable custom made jewelry can be..... ESPECIALLY if the jeweler knows what you like (this is where step one comes in). And if you can give the jeweler examples... it is a SNAP!!! I was actually able to save over $4000 by going with a custom piece because I controlled how much gold, how many diamonds, where they were placed, how they were set, etc. BTW.... make sure whoever you use is reputable and allows you to approve designs throughout the entire process from CAD design to molding all before the finished piece is created.

 |
When he and I first discussed the idea of upgrading, I was concerned that our finances just wouldn't allow for a new ring purchase.... let alone an UPGRADE. Then we discovered it CAN be done and within budget if you're willing to "trade in" or "recycle" what you currently have, so I wanted to share what we learned. I also thought I'd show you some of my favorite styles of rings, so I'll sprinkle those along the way throughout this post. Clicking on the pics will open links that will take you to the sites where I found these rings. You'll just have to wait (like me) to see what I actually end up with. The one at the top is my favorite, but with a $40K price tag, NOT INCLUDING the center stone, it is just going to have to stay on my wish list.....
1. Start with a plan. I went to Pinterest for engagement ring styles that I like. Don't worry about the price tag (unless it's $40K), because what you're basically looking for is what you like and what you don't like. This will come in handy on a later step (keep reading) and will also save you a ton of money in gas! See, you're already saving $ and we just started.
2. Know the CURRENT value of what you already own. This helps because knowing what you already have gives you a baseline. I was lucky enough to have an appraisal for insurance purposes. This allowed me to know cut, color and clarity of every stone in my ring as well as the quality of metal so NO ONE could dispute the quality of what I would be "selling" or "trading in" for an upgrade. You typically receive about half of the value of your center stone and up-to about half of the metal to use toward an upgrade. You get NOTHING for workmanship.... the exception is if your wedding jewelry is a well-known/award-winning name brand and an investment grade piece. That will generally yield a bit more toward an upgrade, but for most jewelry, don't expect to get what you paid for it.
3. Shop that sale or trade! DON'T take your ring or rings to one jeweler who advertises "we buy gold" and accept an offer. The first jeweler I went to offered me $500, the next offered me $625, the third $200 and finally the last one offered me $1000. That is a SIGNIFICANT jump! The other thing to consider is that the jeweler who you are buying the upgraded ring from is USUALLY the one who will give you the most because you are giving them new business. DON'T be offended when you hear the word "scrap" when referring to your current wedding jewelry. Remember that your ring is well worn and loved but to them it truly is "scraps". I almost cried when one of the jewelers actually referred to my beloved wedding set as "scrap". A great jeweler is not a pawn shop... they are in the business of selling NEW jewelry. That being said, I'm sure there are great jewelers who also run pawn shops.
5. RECYCLE!!! If you find a setting style you love and are going to go the custom route, see if you can have the gold and gems from your current set used to make the new jewelry. I was able to get a HUGE discount by using my current center stone and the gold from my first wedding set towards creating my new ring instead of just doing a regular trade in. Utilizing the materials is what gave me that final $1000 credit that was so much higher than the other offers I received from the other jewelers. The bonus is I get to retain my original wedding set WITHIN the new jewelry by doing this. That is monumental for me because my original wedding ring is blessed. And typically the center stone is the largest cost of an engagement ring, so recycling the center stone saved me TONS!
6. SCROUNGE!!!! This tip was probably the biggest bang for my upgrade budget buck! Once I got the price for the upgraded ring down as low as it could possibly go, I went through all my old jewelry and pulled gold pieces that I don't wear (or pieces I WON'T wear because of bad juju) and sold them for that "scrap" gold I talked about earlier. I was able to take another $600 off the price of my ring by doing this AND made space in my jewelry box for new goodies!
I am having a hard time putting into words how thrilled I am! I can't wait to share the process with you guys. I am STUNNED that I am able to have a beautifully upgraded, customized ring and the process was painless... enjoyable actually. I also want to send a shout out to my friend Waverly for donating 40 cents toward the purchase of my $40,000 dream ring pictured at the top. Just 399,000 more 40 cent donations and THAT RING IS MINE!!!!
*** UPDATE 6/28/14: Since this post originally went live, I gathered even more gold to trade and got a credit totaling $1400!!!! All from jewelry I don't or won't wear..... INCREDIBLE!!!!
Comments